Communication and sharing promote growth
Joining Hands for Development!

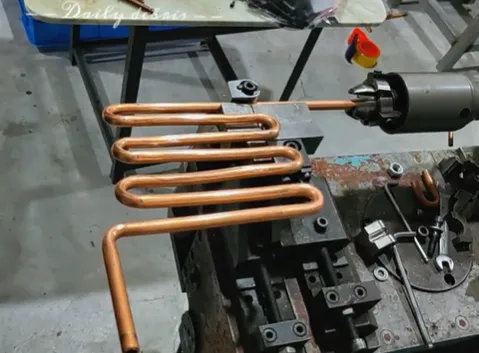
1-Copper Tube Pre-treatment (Bending and Flattening)
Objective: To shape straight round copper tubes into flattened forms that exactly match the designed flow paths.
a. Material Selection: Why Oxygen-Free Copper?
Oxygen-free copper (C1220) has a purity of up to 99.9% and is free of grain boundary oxides, giving it excellent ductility, making it as malleable as dough. It is less prone to cracking or micro-cracking during bending and flattening, ensuring subsequent reliability.
b. Bending Radius: The Safety Bottom Line
The minimum bending radius must be ≥ 1.5 times the tube diameter—this is an iron rule. If this value is exceeded, the outer wall of the copper tube will be over-stretched, leading to thinning or even rupture. Using a mandrel bending machine is key to preventing wrinkling on the inner side.
c. Flattening: A Precise "Slimming" Process
Flattening is not simply about crushing the tube; it involves controlled plastic deformation through precision molds. The height of the flow channel after flattening must not be less than 30% of the original inner diameter. The core goal is to ensure uniform wall thickness after flattening, avoiding local dead folds or excessive thinning, as such defects would become potential leakage points in the future.

Figure 1: Heat Pipe Bending
d. Process Decision: Bend First or Flatten First?
It must be "bend first, then flatten." Bending round tubes is a mature and controllable process. If flattened first, the flattened tube can hardly undergo small-radius, high-quality bending, and the inner wall of the flow channel would be severely deformed, causing a sharp increase in flow resistance.
2-Substrate Processing (Precision Groove Milling)
Objective: To machine precisely dimensioned "tracks" on the aluminum substrate for embedding the copper tubes.

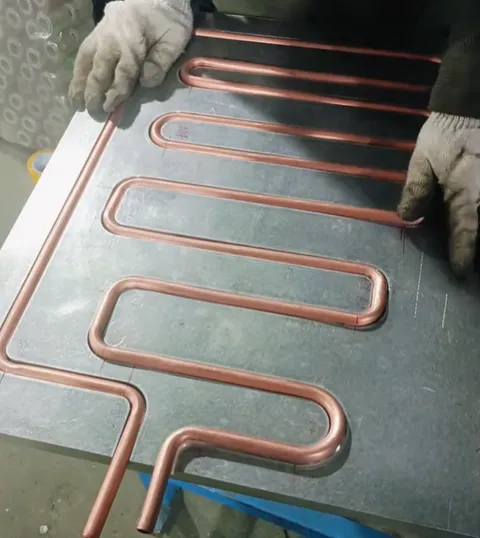
Figure 2: Embedded Copper Tube
a. Groove Width Design: Interference Fit
The groove width must be designed slightly smaller than the width of the flattened copper tube (typically by 0.05-0.1 mm) to form an "interference fit." This utilizes frictional force to tightly "grip" the copper tube, which is the foundation for initial fixation and reducing contact thermal resistance.
b. Groove Depth Control: Skiving Allowance
The groove depth determines the height by which the copper tube protrudes above the substrate surface after embedding. This height constitutes the machining allowance for the subsequent skiving process. The consistency of the groove depth directly affects the uniformity of the final remaining wall thickness of the copper tube.
c. Tooling and "Tool Chatter"
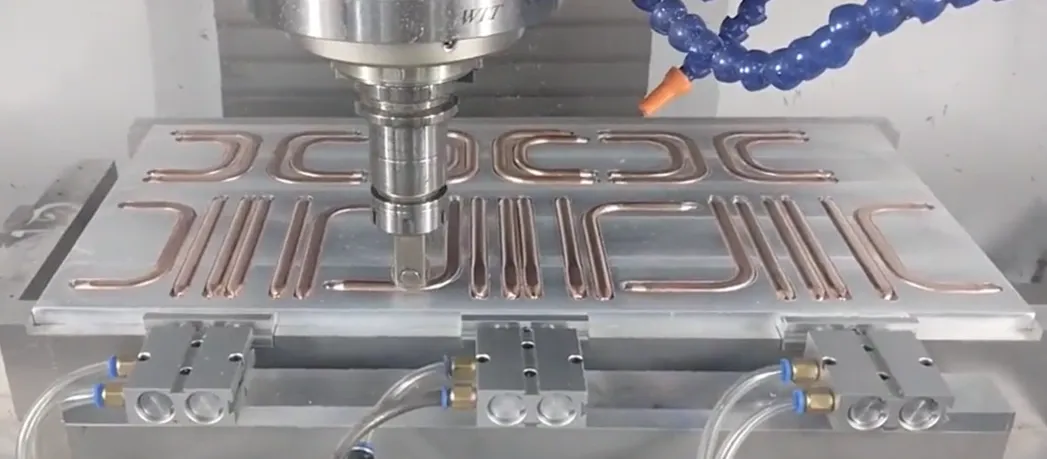
When milling narrow and deep grooves, an excessively large length-to-diameter ratio of the milling cutter can easily cause "chatter." This leads to rough groove walls and dimensional inaccuracies. Therefore, the flow channel spacing cannot be too small; sufficient space must be reserved for tool strength and rigidity.
d. Cleanliness: The Invisible Quality Factor
After groove milling, aluminum chips and oil stains must be 100% removed. Any residue will form a thermal barrier between the copper tube and the aluminum substrate, significantly increasing the contact thermal resistance and causing a substantial degradation in thermal performance.
3-Nesting and Fixation
Objective: To precisely embed the formed copper tube into the substrate groove and form a stable bond.
a. Interference Fit: The Primary Fixation Force
Relying on precise dimensional design, an external force from a press is used to "squeeze" the copper tube into the slightly narrower groove. The elastic restoring force of the material itself generates a significant normal pressure, which is the primary source of the fixation force.

Figure 3: Heat Pipe Securing
b. Auxiliary Fixation: Preventing the "Seesaw Effect"
Relying solely on the interference fit, the ends of the copper tube may lift under thermal stress. Auxiliary fixation is required: micro-spot welding (high strength, requires thermal control) or high thermal conductivity epoxy resin (low stress, but has aging risks).
c. The Enemy of Interface Thermal Resistance
Air between the copper tube and the aluminum groove is a poor conductor of heat and is the main source of interface thermal resistance. High thermal conductivity paste or welding can fill the microscopic gaps, replacing the air and significantly reducing the thermal resistance.
d. Galvanic Corrosion Warning
Aluminum and copper can form a galvanic cell in the presence of an electrolyte, where aluminum, acting as the anode, will corrode. It is crucial to ensure the cooling system's integrity and use deionized water/anti-corrosion coolant to eliminate the corrosion path at the system level.
4-Surface Finishing (Skiving vs. Deep Burial)
Objective: To form the final cooling surface, which can be used for mounting chips, characterized by high flatness and low thermal resistance.
copper tubed cold plate from Walmate
a. Skiving Process: The Performance King
This process uses ultra-hard cutting tools to simultaneously cut both copper and aluminum, creating a perfectly co-planar and flush surface. This allows the heat source to achieve direct, large-area contact with the highly thermally conductive copper tube, resulting in the lowest possible thermal resistance.
b. Deep Buried Tube Process: The Reliability Guardian
This process involves embedding round copper tubes and filling the gaps with high thermal conductivity epoxy resin. The copper tubes retain their circular shape, offering greater pressure-bearing capacity. The filler material provides additional protection and stress buffering, leading to higher reliability, although the thermal resistance is slightly higher than that achieved by skiving.
c. Final Wall Thickness: The Lifeline
The core control objective of the skiving process is the final remaining wall thickness of the copper tube. A balance must be struck between performance (requiring thin walls) and reliability/prevention of cutting through (requiring thick walls). This thickness is typically controlled within the golden range of 0.15-0.3 mm.
d. Flatness: The Guarantee of Contact
Regardless of the process used, the flatness of the mounting surface (typically required to be <0.1 mm) is a mandatory specification. Micron-level variations must be filled with thermal grease. Poor flatness will lead to a sharp increase in contact thermal resistance, resulting in cooling failure.
We will regularly update you on technologies and information related to thermal design and lightweighting, sharing them for your reference. Thank you for your attention to Walmate.